
Alert/Notification Bar
Skip to main content
How Can We Help?
The WP Front Notification Bar plugin lets you display a prominent message at the top or bottom of your site for special announcements and important alerts. As a periodic/temporary element, it is be more noticeable to regular website visitors than if it is used often.
Creating a New Notification Bar
- In the WordPress dashboard, go to Settings> Notification Bar.
- Click Add New to create a new notification bar.
- Enter a title for internal reference (e.g., “Holiday Closure Alert”).
- In the Message box, add the text you want to display. – You can include links using standard HTML or the WordPress link editor.
Configuring Display Options
WP Front Notification Bar provides flexible settings to control where and how the bar appears:- Position – Choose whether to display the bar at the top or bottom of the page.
- Close Button – Enable an “X” icon so users can dismiss the message.
- Auto Close – Set the bar to hide automatically after a few seconds (optional).
Setting Start and End Dates
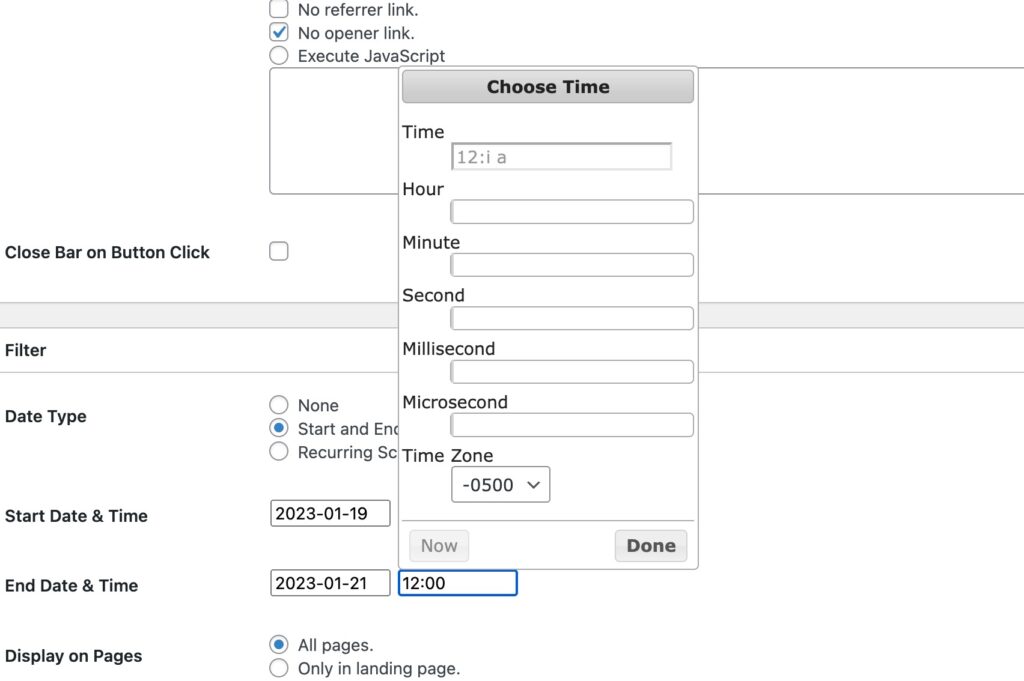
You can schedule notification bars in advance or set automatic expiration (screenshot below):- Scroll to the Display Rules section in the settings panel.
- Set the Start Date & Time for when the bar should begin showing.
- Set the End Date & Time to automatically hide the bar after a specific period.
Publishing the Notification Bar
- Review your settings to confirm everything is correct.
- Click Publish to make the bar active on your site.
Pro Tip: Use expiration dates for time-sensitive messages to keep your notifications relevant and avoid displaying outdated alerts.
Posted in
